If you’re using a DTG printer, there’s one step you should never skip — pretreatment. It’s a simple process, but it makes a big difference in how your final prints look and last.
In this guide, we’ll explain what DTG pretreatment is, why it’s important, and how to perform it correctly, step by step.
🎯 Why Do You Need Pretreatment for DTG Printing?
Pretreatment is like a primer before painting a wall — it helps the ink adhere to the fabric, making your print look better.
Here’s what pretreatment does:
- Makes white ink stay bright and sharp on dark fabrics
- Keeps colors vibrant and bold
- Helps your designs last longer after washing
If you skip this step, your print may appear faded or fade quickly.
🧪 When Should You Pretreat a Shirt?
You need to pretreat if:
- You’re printing on dark shirts (like black, navy, or red)
- You’re using white ink under your design
- You’re working with blended fabrics that absorb ink too fast
You can skip it on white shirts, but pretreating can still help the print look smoother and stay longer.
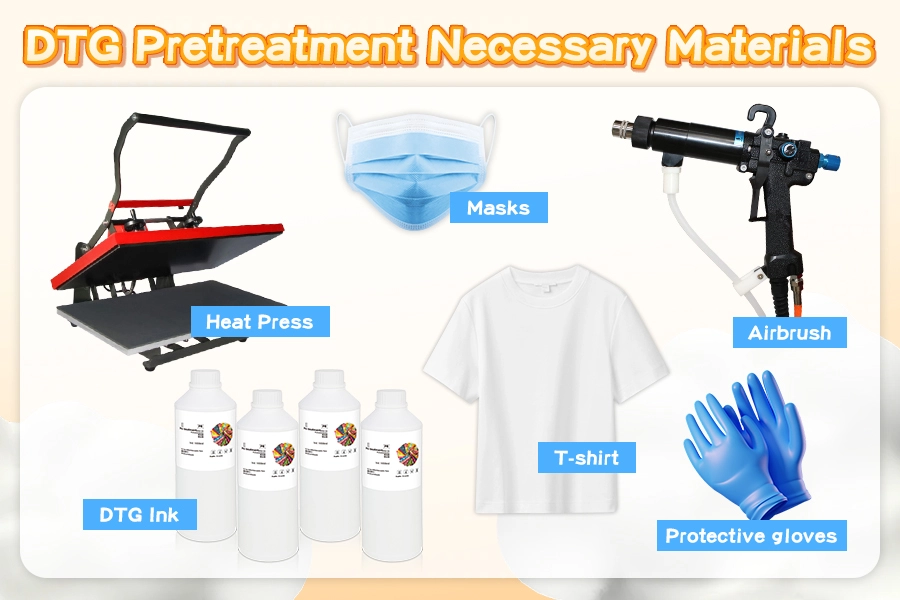
🧰 What You Need for Pretreatment
To do it right, you’ll need:
- Pretreatment liquid
- A spray bottle or pretreatment machine
- A heat press or curing unit
- A lint roller (optional but helpful)
✅ Pro Tip: Using a reliable pretreatment, such as Winnerjet DTG Pretreatment, ensures smooth prints and vibrant colors. It’s made for cotton and cotton blends and works perfectly with most DTG printers, especially Epson-head printers.
🛠️ Step-by-Step: How to Pretreat a Garment
- Lay the shirt flat: Place it on a smooth surface or spray table. Use a lint roller to remove dust or fibers.
- Spray the pretreatment liquid: Cover the print area evenly. Don’t soak it — just a light, even coat.
- Spread the liquid if needed: Use a card or squeegee to smooth the surface gently.
- Press the shirt to dry it: Use a heat press at about 160–170°C (320–338°F) for 30–40 seconds. Use medium pressure and a protective sheet on top.
- Check the result: The area should feel dry and slightly firm to the touch. If it’s sticky or too soft, you may need to press it again.
⚠️ Mistakes to Avoid in Pretreatment
- Too much liquid → Can cause staining or rough textures
- Uneven spraying → Leads to patchy colors or blurred prints
- Not pressing enough → Ink may bleed or wash off
Keep your setup clean and follow the same process consistently for optimal results.
🧤 Tips for Pretreated Shirt Storage
- Store shirts in a dry, dust-free place
- Use them within 1–2 days
- Place a paper sheet between the layers when stacking
🏆 Why Choose Winnerjet Pretreatment?
With over 15 years in textile ink manufacturing, Winnerjet offers DTG pretreatment liquids that are:
- Easy to use, even for beginners
- Fast-drying and non-sticky
- Safe and eco-friendly (low odor, non-toxic)
- Perfectly matched to Winnerjet DTG inks for better printing results
💡 Need help choosing the right solution for your shirts or printers? Contact Winnerjet for free advice or request a free sample!
✅ Final Thoughts
DTG pretreatment doesn’t have to be complicated, and it’s one of the best ways to make your designs look amazing and last longer.
By following the right steps and using trusted products like Winnerjet’s DTG Pretreatment, you’ll get bright colors, strong whites, and happy customers.
🎯 Want better print quality today? Request a sample or talk to a Winnerjet expert now.
❓Frequently Asked Questions
Do I always need to pretreat before DTG printing?
Only if you’re printing on dark or colored shirts or using white ink for light shirts is it optional.
Can I pretreat in advance?
Yes, but use the shirt within 24–48 hours. Store it in a clean, dry space.
What happens if I use too much pretreatment?
Your print might feel rough or look stained. Stick to a light, even spray.
Can I use the same liquid for all fabrics?
No. Select the liquid specifically designed for your fabric type. Winnerjet has options for cotton and blends.
Is it safe to handle pretreatment fluid?
Yes. But it’s still a chemical — wear gloves and spray in a well-ventilated area.