Digital Direct-to-Garment (DTG) technology allows us to create stunning, full-color apparel with ease. However, the secret to a vibrant print that stands the test of time lies not in the printer, but in the curing process. DTG ink is essentially a sophisticated aqueous suspension; its internal binder resins only trigger a “cross-linking reaction” when exposed to specific high temperatures.
If you fail to master the correct curing methods, even the highest quality inks will fade or peel after the very first wash. In this guide, we will take a deep dive into how to cure dtg ink, provide specific parameters for DuPont inks, and share the essential curing technique.
Mastering Professional DTG Ink Curing Techniques
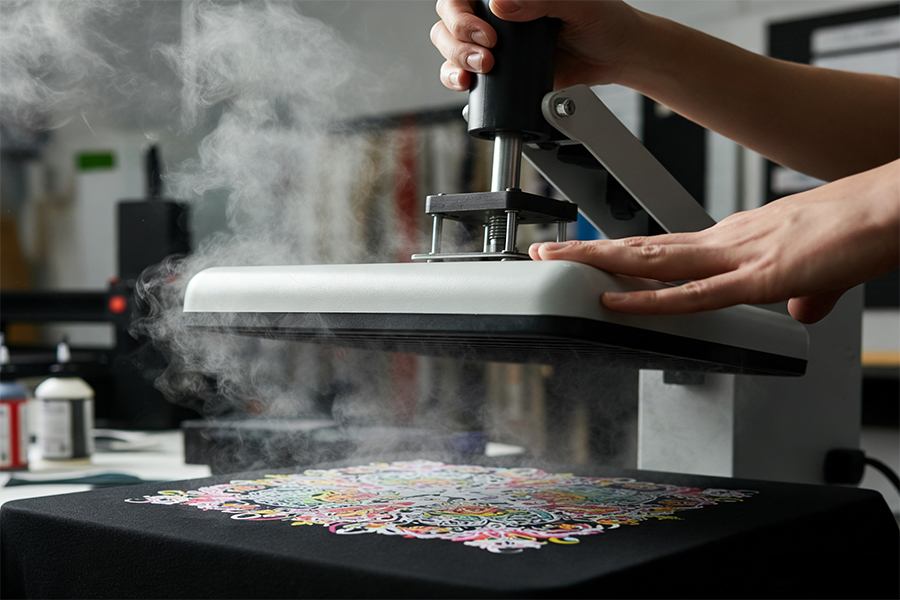
Achieving the perfect print requires balancing temperature, time, and pressure—the core pillars of how to cure dtg ink. Professional curing is not just about heating; it is a two-stage process. First, utilize the how to hover cure dtg ink (hover curing) technique by suspending the heat plate 1cm above the design for 30–60 seconds to gently evaporate moisture and prevent color bleeding. Second, apply the final cure with a closed-down press based on your ink brand’s requirements (for example, the standard for dupont dtg ink is typically 165°C for 90–180 seconds).
Summary of Core Techniques:
Precision Temperature Control: Use an infrared thermometer to ensure the heat plate’s actual temperature reaches 160°C–175°C.
Light Pressure: Avoid excessive pressure that flattens fibers; maintain a “breathable” and elastic ink layer.
Proper Venting: Ensure water vapor can escape completely. This is the key to transforming the inherent quality of DTG ink into superior washfastness.
What is DTG Ink Curing and Why Does It Matter?
In the world of DTG printing, curing is the final and most critical step in the production process. Simply put, curing is the application of heat to the printed garment to chemically bond the ink to the fabric’s fibers. Without this thermal reaction, the ink remains a liquid or semi-dry layer on the surface rather than becoming a permanent part of the shirt.
Why Is Proper Curing Essential?
If you skip or rush the curing process, you will encounter two major issues that can ruin your reputation as a high-quality printer:
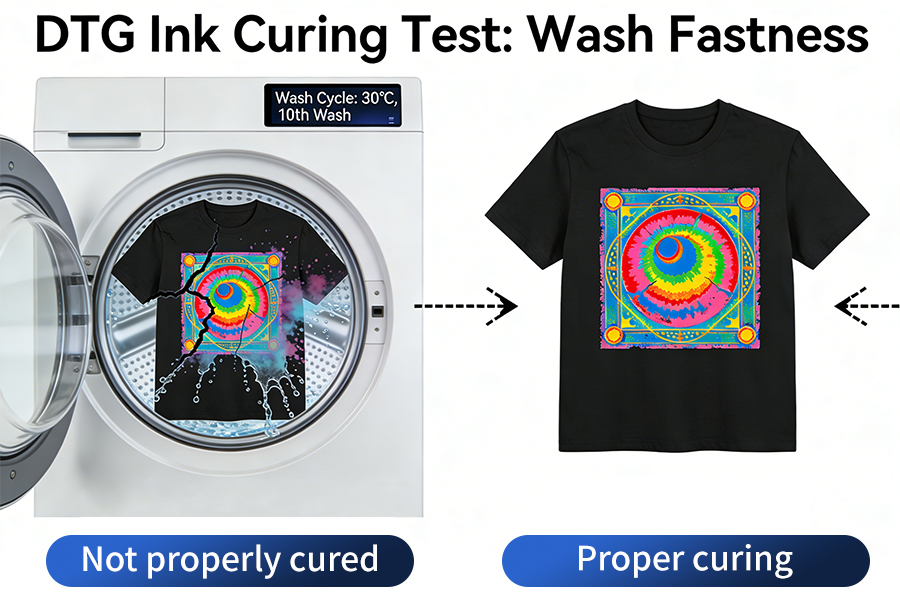
Color Fading (Wash Fastness): Without full heat activation, the ink pigments won’t “lock” into the textile. As a result, the vibrant colors will wash away during the very first laundry cycle, leaving you with a dull, faded image.
Ink Cracking and Peeling: Improperly cured ink becomes brittle. As the wearer moves and the fabric stretches, the ink layer will crack or even peel off in flakes, making the garment look cheap and unprofessional.
For 2026, with the rise of higher-pigment DTG inks, achieving the perfect balance of time, temperature, and pressure is more important than ever to ensure your prints stay soft, stretchable, and durable for over 50+ washes.
4 Steps for Curing DTG Ink (Time and Temperature Settings)
Achieving a retail-quality finish requires a standardized workflow. Follow these four professional steps to ensure your DTG prints are fully cured and ready for the customer.
Step 1: Preparation (Ensure the print is touch-dry)
Before applying heat, allow the garment to sit for a few moments. The ink should be “touch-dry” or at least not dripping wet. If you are using a heat press, placing a piece of high-quality parchment paper or a Teflon sheet over the print is mandatory. This prevents the wet ink from sticking to the heat plate and ensures a smooth, professional matte or glossy finish.
Step 2: Setting the Temperature (160°C – 165°C)
Precision is key. For standard cotton garments, set your curing equipment to 160°C – 165°C (320°F – 330°F).
For Heat Presses: Aim for a duration of 90 to 120 seconds.
Pro Tip: If you are printing on polyester blends or delicate fabrics, you may need to lower the temperature to around 140°C and extend the time to prevent scorching or dye migration.
Step 3: Applying Pressure (Light to Medium Pressure)
Unlike HTV (Heat Transfer Vinyl), DTG curing does not require heavy pressure. You only need light to medium pressure to ensure the heat penetrates the fibers evenly.
Why light pressure? Excessive pressure can crush the fibers or flatten the white ink base too much, leading to a “stiff” feel or fibers poking through the ink (fibrillation). The goal is to evaporate the water carrier in the ink while bonding the pigment.
Step 4: Testing (The Stretch Test)
Never ship a batch without testing the first piece. Once the garment has cooled down completely, perform the “Stretch Test”:
- Grasp the printed area and gently pull the fabric.
- If the ink stretches with the fabric and returns to its original shape without cracking, it is fully cured.
- If the ink cracks or feels tacky, it requires additional curing time.
Why the Quality of DTG Ink Determines the Curing Ceiling
Many practitioners fall into the trap of thinking curing is just “drying.” In reality, it is a rigorous physicochemical reaction. The importance of DTG ink lies not just in its color rendering, but in its ability to biochemically bond with fabric fibers, which directly dictates the washability of the final product.
1. Chemical Compatibility and Thermal Stability
Premium inks, such as those from DuPont, are specifically formulated to withstand high-temperature pressure.
Color Fidelity: High-quality inks possess exceptional thermal stability. This means when learning how long do you cure dupont dtg ink, the color molecules remain stable even after 180 seconds of heat, preventing color shifting or scorching.
Thermal Response Speed: Top-tier inks react more quickly to heat, shortening the curing cycle and boosting production efficiency.
2. Binder Resin and Washfastness
The quality of DTG ink is also rooted in its proprietary resin content. These resins are the key to “locking” the print onto the fibers:
Film-Forming Reaction: During curing, the resin undergoes cross-linking, creating a molecular-level protective film around the pigment.
The Risk of Improper Curing: If you do not understand the advanced nuances of how to cure dtg ink, the resins will not fully activate. The result? The print may feel dry to the touch but lacks an internal film, causing the design to peel off in chunks during washing.
3. Flexibility Across Different Fabrics
Premium inks maintain high elasticity after curing. By mastering how to hover cure dtg ink, you allow the resins to form a smooth film without being crushed by pressure. This ensures the print will not crack when stretched, resulting in a silk-smooth hand-feel.
How long do you cure DuPont DTG ink?
In the DTG industry, the DuPont™ Artistri® series is the gold standard for color and washability. However, its performance depends entirely on precise heat conversion. Regarding how long do you cure dupont dtg ink, you must strictly follow this “Golden Timetable” to ensure perfect molecular cross-linking.
DuPont Ink Curing Core Parameters (Heat Press)
| Fabric Type | Ink Solution | Recommended Temp | Recommended Time | Pressure Setting |
|---|---|---|---|---|
| Light/White Fabric | CMYK Only | 165°C / 330°F | 60 - 90 Seconds | Medium (4-5 bar / 40-60 PSI) |
| Dark/Black Fabric | White + CMYK | 165°C / 330°F | 120 - 180 Seconds | Light (2-3 bar / 20-30 PSI) |
Why do dark garments require longer curing?
A common mistake in how to cure dtg ink is applying a “one size fits all” time. Dark garments use a white ink underbase, making the ink layer several times thicker than on light garments.
The Moisture Barrier: Wet white ink contains significant moisture that must be purged through a longer heating cycle to prevent “flash drying” (surface dry, internal wet).
Staged Curing: If you are concerned that 180 seconds of direct pressure might damage the fabric, combine the how to hover cure dtg ink technique to pre-dry the ink before the final press.
Seasonal Adjustment Tips
The performance of DTG ink depends on its environment. During high-humidity seasons, we recommend adding 10–20 seconds to the how long do you cure dupont dtg ink standards mentioned above, or pre-pressing the garment for 5 seconds to remove ambient moisture before printing.
How to hover cure DTG ink
When handling large areas of white ink or high-saturation designs, a direct press can be a disaster—ink may stick to the parchment paper or edges may blur. Mastering how to hover cure dtg ink (hover curing) is the hallmark of a professional.
1. Why use hover curing?
The importance of DTG ink extends to its physical state transformation. A wet white underbase acts like a liquid film; if sudden mechanical pressure is applied, the explosive force of evaporating water will scatter the pigment.
Preventing Displacement: how to hover cure dtg ink allows the ink surface to “skin,” locking the design’s silhouette in place.
Enhancing Brightness: Hovering allows moisture to evaporate freely without pushing the white ink deep into the fibers, maintaining maximum opacity and brightness.
2. How to hover cure DTG ink: Standard Operating Procedure
Safe Distance: Lower the heat plate to roughly 10mm–15mm (approx. 0.5 inches) above the design. Never lock the press; the plate should not touch the wet ink.
Evaporation Cycle: Maintain the hover for 30 to 60 seconds. You will see steam escaping from the garment—this is the deep dehydration of the ink.
Touch Test: Once the surface shifts from glossy to matte and no visible moisture remains, cover with parchment paper.
Final Set: Close the press for the final cross-linking reaction based on the how long do you cure dupont dtg ink standards (e.g., 90–120 seconds).
Scientific Wash Testing and Quality Checklist
Mastering the theoretical parameters of how to cure dtg ink is only the first step. Professional printers must utilize scientific verification. The quality of DTG ink is proven not at the printer, but in its post-cooling polymer stability.
1. Why wait to test after curing?
Many beginners pull on the design immediately after opening the press, leading to false results. The resins remain in a semi-fluid state while hot. You must wait for the garment to cool completely (approx. 2 minutes) to allow the molecular chains to lock fully before testing.
2. The Ultimate Curing Checklist
Self-test your production with this checklist before delivery:
Visual Inspection: Is the surface dry and matte? (A glossy finish may indicate excessive pressure or heat).
Hand-Feel Test: Prints cured using the how to hover cure dtg ink method should feel soft. A “thick plastic” feel suggests the pressure settings need optimization.
Scientific Wash Simulation: Machine wash the sample in 60°C (140°F) water. High-standard DTG ink should withstand 50+ cycles without fading.
Edge Micro-crack Observation: After washing, if fine cracks appear at the edges, the actual temperature for how to cure dtg ink was likely off, possibly due to heat plate aging or uneven heat distribution.
Which DTG Inks Stand Out in Curing Performance?
Choosing the right ink makes how to cure dtg ink much easier. Different brands react differently to heat. Here are the 2026 industry leaders based on washfastness and stability:
1. Winnerjet High-Performance DTG Ink (The Premier Choice for Value and Compatibility)
As a professional Winnerjet ink supplier, we are committed to providing users with ink solutions that excel during the curing stage. Winnerjet ink is specifically engineered for print shops pursuing both color precision and extreme washfastness.
Why we recommend it: Winnerjet utilizes the latest micro-encapsulation technology to optimize pigment rheology. While maintaining excellent color density, it is highly sensitive to heat press temperature feedback, making it easy to achieve a “full cross-link.”
Curing Advantage: Compared to traditional inks, Winnerjet significantly shortens the pre-dry time for how to hover cure dtg ink. Its white ink layer provides superior opacity and dries thoroughly, solving the “sticky print” issues often found with dark garments.
2. DuPont™ Artistri® P5000+ Series (The Industry Gold Standard)
Why we recommend it: Its patented resin formula drastically reduces curing difficulty. Even during complex how long do you cure dupont dtg ink cycles, it maintains extreme color accuracy and a soft hand-feel.
Curing Advantage: High tolerance levels. When combined with professional curing techniques, fading or sticking is virtually non-existent.
3. Image Armor® Series (The Speed Curing Pioneer)
Why we recommend it: Known for “flash drying,” this ink significantly cuts down heat press time, increasing hourly output.
Curing Advantage: Once you master how to cure dtg ink, you’ll find its white ink dehydrates rapidly, preventing moisture buildup and pinholes on dark shirts.
4. Firebird® FBX-100 Series (High Elasticity Choice)
For studios seeking explosive color vibrancy and fabric stretchability, Firebird delivers outstanding performance.
Recommended for: Its ultra-high white ink whiteness makes it ideal for designs requiring intense visual impact.
Curing Advantage: This ink exhibits exceptional molecular elasticity after curing. If other inks show cracking during wash fastness testing, Firebird’s flexibility will stand out remarkably.
❓ FAQ-Can You Cure DTG Ink Without a Heat Press?
How long does it take to cure DTG ink?
On a heat press, it typically takes 90 to 120 seconds at 160°C-165°C. In a conveyor dryer, it usually takes 2 to 3 minutes depending on the belt speed and chamber length.
Can I use a household iron?
Yes, but only for DIY or samples. It lacks the consistent pressure and temperature of a professional heat press.
Method:Turn off steam, cover the print with parchment paper, and press firmly at 320°F (160°C) for 2–3 minutes while moving the iron.
How do I know if my DTG ink is fully cured?
Perform a “Stretch Test.” Gently pull the printed area; if the ink cracks or doesn’t snap back with the fabric, it needs more curing time.
Why is my DTG print stiff after curing?
This is usually due to too much pressure or excessive pretreatment. Use light pressure on your heat press and the correct amount of pretreatment to maintain a soft, retail-quality hand-feel.
Can I air-dry DTG prints without heat?
No. DTG ink requires heat activation (typically 160°C) to bond with the fabric. Air-drying will cause the design to wash off during the first laundry cycle.
Can I use a hair dryer?
No. The print will wash off instantly. A hair dryer only evaporates surface water. It cannot reach the 320°F (160°C) needed to cross-link the textile binders, causing the ink to crack and bleed in the wash.