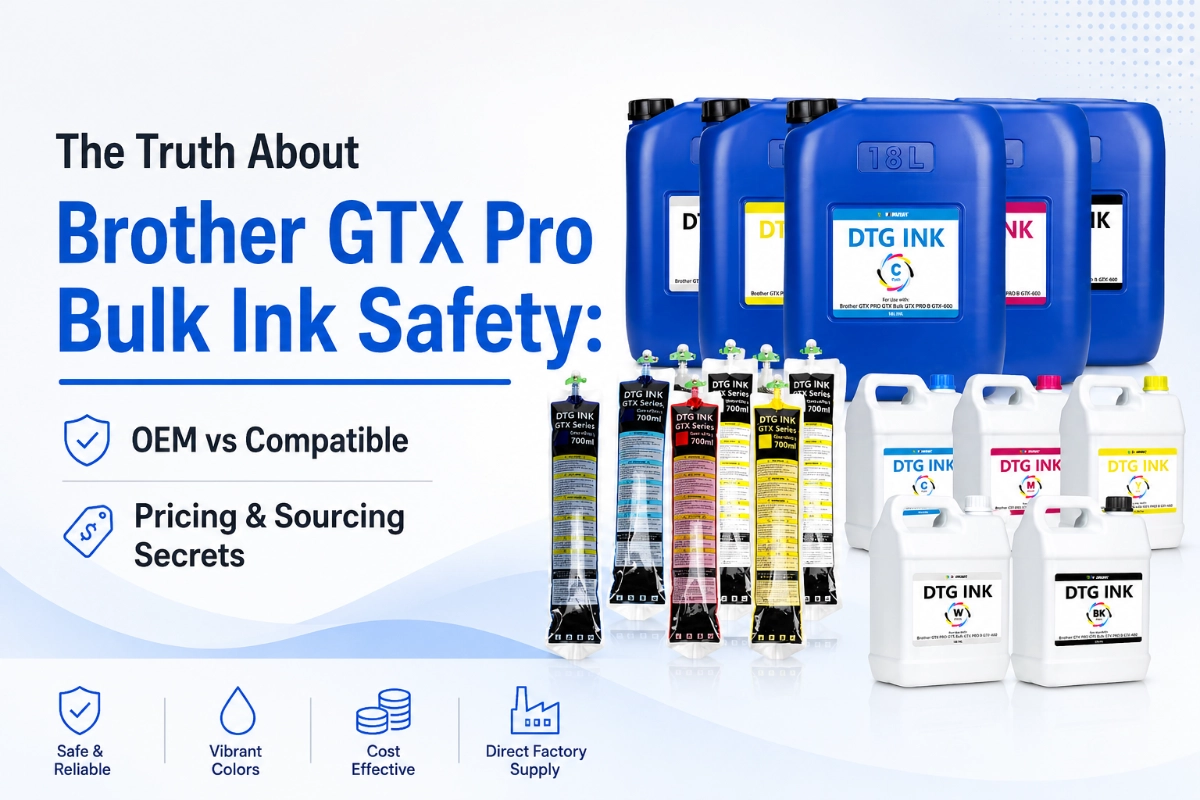
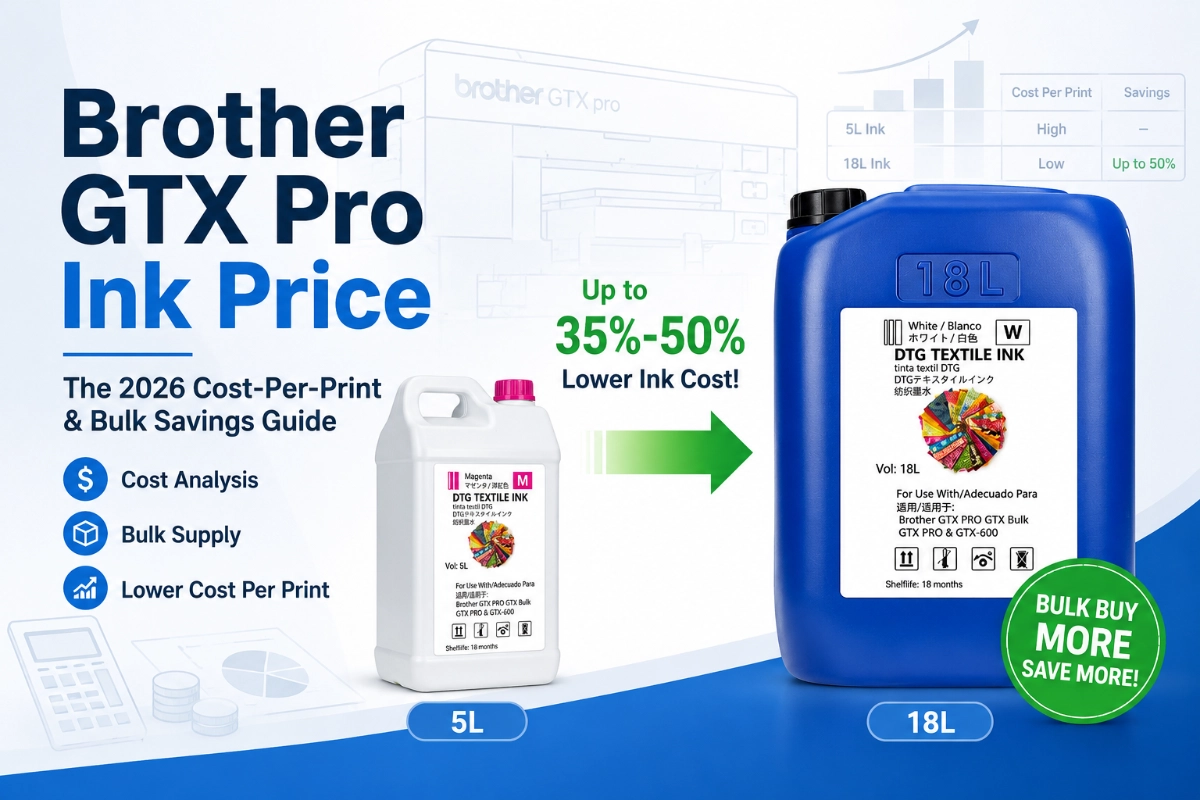
How to Make Ink from Pigment Powder
From Powder to Ink: A Hands-On Guide to Making Pigment Ink
When using pigment ink, you might wonder how to make ink from pigment powder. The transformation from pigment powder to ink is a complex process. As a company with 20 years of experience in producing pigment ink, we're very familiar with this production process. Today, we'll walk through a simple home experiment to transform dry pigment powder into usable ink while uncovering the core principles behind pigment ink.
I. Pre-Experiment Preparation: Understanding Key Materials
Before starting the experiment, we need to clarify the nature of "pigment ink" – it's not a simple dissolution of pigment powder, but a stable mixture where pigment particles are evenly dispersed in a liquid carrier. Therefore, choosing the right materials is crucial for the success of the experiment.
1. Essential Materials List (Household Accessible Version)
| Material Name | Function and Selection Recommendations |
|---|---|
| Pigment Powder | The core component providing color. It's recommended to choose mineral pigments (such as titanium white, ochre, ultramarine) or high-quality acrylic pigment powders. Avoid using organic dye powders that fade easily. Use approximately 5-10 grams (adjustable according to desired concentration). |
| Dispersion Medium (Carrier) | The "solvent" that allows even dispersion of pigment particles. For beginners, deionized water is recommended. For waterproof ink, you can replace it with 75% alcohol or a mixture of glycerin and water. Use approximately 20-30 ml. |
| Dispersant | The "stabilizer" that prevents pigment particles from settling. At home, you can use dish soap or gum arabic powder. Use only 1-2 drops (or 0.5 grams of powder). |
| Tools | Small transparent beaker, glass rod, small spoon, filter paper, sealed bottle (for storing ink). |
II. Experimental Steps: Step-by-Step Pigment Ink Making
The entire process is divided into three steps: "dispersion mixing," "filtration purification," and "testing adjustment." It's low in difficulty and suitable for parent-child activities or craft enthusiasts.
Step 1: Prepare the Basic Mixture (Core: "Disperse" the Pigment)
- First, pour 5 grams of pigment powder into a glass, add 5 ml of dispersion medium (taking water as an example), and gently stir with a glass rod for 1 minute – a "paste" will form at this point because pigment particles tend to clump together and need to be "wetted" first.
- Slowly add the remaining 15 ml of water to the paste mixture while stirring rapidly for 3-5 minutes (the faster the speed, the more evenly the pigment disperses). Note: If significant particle precipitation occurs, add 1 drop of dish soap and continue stirring for 1 minute.
Step 2: Filtration and Purification (Key: Make the Ink "Clean")
- Fold the filter paper twice to form a funnel shape and place it in a small funnel (if no funnel is available, place the filter paper on the edge of the cup).
- Slowly pour the mixed liquid into the filter paper and wait for filtration to complete (about 5-10 minutes). Undispersed large particles will remain on the filter paper, and the liquid in the cup is the initial "pigment ink."
- For finer ink, re-filter the filtered liquid – ink filtered twice won't clog pen nibs when writing and won't have a "grainy texture" when painting.
Step 3: Testing and Adjustment (Practical: Make the Ink "Usable")
- Concentration Test: Dip a brush into a small amount of ink and draw a line on white paper. If the line is light in color and smudges severely, it means there's too much water. You can pour it into a pot and heat it over low heat (no more than 60°C) to evaporate some water. If the line has "cracks" after drying, the pigment concentration is too high – add 1-2 ml of water to dilute.
- Storage Treatment: Pour the adjusted ink into a sealed bottle, add 1 drop of glycerin (optional, as glycerin prevents ink from drying out), tighten the cap and shake for 10 seconds, attach a label (indicating pigment color and production date), and store in a cool place.
III. Notes: Safety and Success Rate Tips
- Safety First: If using mineral pigments (such as ochre, ultramarine), wash hands promptly after the experiment to avoid accidental ingestion. Use low heat when heating to prevent liquid splashing. Children should be accompanied by adults during operation.
- Color Selection: Organic pigment powders like red and yellow (such as azo red) fade easily and are not recommended for long-term storage. Inorganic pigments like black (carbon black pigment powder), blue (ultramarine), and white (titanium white) have strong stability and are suitable for beginners.
- Failure Remedies: If the ink still precipitates after filtration, repeat the filtration. If the pen nib clogs during writing, it may be due to insufficient dispersant – add 1 more drop of dish soap in the next production.
IV. Expanded Thinking: From Experiment to Daily Life
Through this experiment, we can understand the "secrets" of commercial pigment inks. For example, waterproof inks used in printers actually use "resin" instead of dish soap as a dispersant and "ethanol" instead of water as a carrier, allowing the ink to form a waterproof film after drying on paper. Calligraphy ink for brushes uses "pine soot" (carbon black formed by burning pine trees) as the pigment and "glue" (animal or plant glue) as the dispersant, giving it a "lustrous finish" after drying.
If you enjoy crafts, you can try advanced techniques: add a small amount of gold powder to the ink to make "gold ink"; add crushed petals (boiled and filtered in advance) to make "plant-patterned ink" – as long as you master the core formula of "pigment + dispersant + carrier," you can create unique, custom ink.
Conclusion
Making ink from pigment powder is not only a fun craft experiment but also a window into understanding "materials science." From the dispersion of powder to the formation of ink, each step contains simple physical principles. Next time you use a pen or brush, think about it: the ink in your hand is actually the result of countless tiny pigment particles "neatly arranged" in liquid – science is often hidden in these daily details.
Through this simple experiment, do you now understand how to make ink from pigment powder? If you have more questions, please contact us and we'll be happy to answer them.