Have you ever dreamed of having secret messages that only you and a chosen recipient could see? Or perhaps you want to set up a thrilling science experiment or a treasure hunt for kids? Invisible ink, with its air of mystery, is key to bringing these imaginative ideas to life. And when it comes to the kind that only reveals itself under a specific light source—ultraviolet (UV) light—it adds an extra layer of technological intrigue.
If you want to know how to make invisible ink that glows under UV light, you’ve come to the right place. In this DIY guide, we’ll show you how to create invisible UV ink using simple household items.
This article will guide you step-by-step on how to make safe and fun UV invisible ink using common household materials.
How To Make Invisible Ink UV Light?What is UV Invisible Ink?
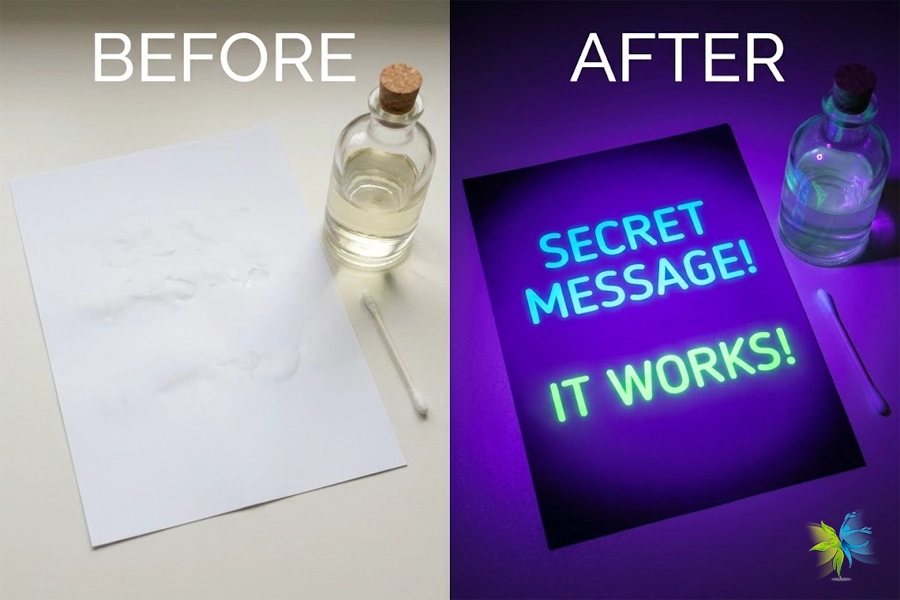
Imagine writing on a blank sheet of paper, yet nothing is visible on the surface. Then, you pick up a UV lamp, shine it over the paper, and miraculously, those unseen words suddenly appear, glowing with fluorescence! That’s the magic of UV invisible ink.
UV invisible ink, as the name suggests, is a type of ink that is invisible to the naked eye under normal visible light. However, when exposed to ultraviolet (UV) light, the specific substances within it emit visible light, making the hidden message appear.
In everyday life, UV invisible ink has many fun applications:
Kids’ Fun & Parties: Create secret messages, treasure hunt clues, surprise cards, or unique party tickets for a “spy” adventure.
Science Experiments: It’s an excellent tool for exploring the principles of fluorescence, UV light properties, and chemical reactions, sparking children’s interest in science.
Security Applications: Some anti-counterfeiting technologies (like security marks on currency or invisible watermarks on documents) use similar principles.
Personal Creativity: Make unique artworks, secret letters, or games.
1.How Invisible Ink Works: UV Light and Fluorescence
To understand the magic of UV invisible ink, we need to delve a bit into science.
The Principle of UV Light and Fluorescence:
Ultraviolet (UV) Light: UV light is a type of light invisible to the human eye. It has a shorter wavelength and higher energy than visible light.
Fluorescence: Certain substances have a special property: they can absorb ultraviolet (or other high-energy) light and then re-emit that absorbed energy in the form of lower-energy visible light. This is what we perceive as “glowing.” This glow is usually instantaneous; once the UV light source is removed, the glowing stops. This phenomenon is called fluorescence.
What Substances Glow Under UV Light?
Many natural and synthetic substances exhibit fluorescent properties. For example, common optical brighteners (found in laundry detergents), certain vitamins (like Vitamin B2 and Riboflavin), the ink in highlighters, and even some plant saps contain fluorescent compounds that can be excited by UV light. These substances absorb UV light energy and then release visible light, often blue, green, or yellow.
Why is Regular Ink Invisible Under UV Light?
The pigments in regular ink primarily show color by absorbing specific wavelengths of visible light. They do not possess the fluorescent property of converting UV light into visible light. Therefore, in the absence of visible ink marks, even when exposed to UV light, they will not glow or reveal anything.
2. Materials You’ll Need: Can I easily make UV ink at home?
Making UV-invisible ink usually doesn’t require complex chemical reagents. Many materials can be easily found at home or in stores. Here’s a breakdown by recipe.
Basic Tools:
Clean cotton swabs, paintbrushes, or toothpicks (for writing)
Clean white paper (preferably paper without optical brighteners for better results)
Small bowls or cups (for mixing solutions)
UV Light: This is crucial for revealing your message!
Recommended Types: It’s best to use a UV flashlight or blacklight with a wavelength of around 365nm or 395nm. These wavelengths are ideal for exciting most household fluorescent substances. Regular UV sterilization lamps (shorter wavelengths) or nail curing lamps (potentially incompatible wavelengths) may not yield optimal results.
Household Ink Materials (by recipe):
Highlighter Ink Method (Most direct, most noticeable effect)
Materials: Any color of highlighter pen (e.g., yellow, green, pink highlighters).
Laundry Detergent Optical Brightener Method (Economical, good effect)
Materials: Laundry detergent containing optical brighteners (usually indicated on the packaging as “fluorescent brighteners” or “optical brighteners”).
Vitamin B2 (Riboflavin) Solution Method (Safe, suitable for children)
Materials: A few Vitamin B2 (Riboflavin) tablets (common yellow pills).
Lemon Juice Method (Classic invisible ink, but requires heat to develop, not UV)
Materials: Fresh lemon.
3. DIY Recipe 1: Using Highlighter Ink (Best Effect)
This is the simplest and most effective method for making UV invisible ink, as highlighters already contain fluorescent dyes.
Step-by-Step Guide:
Disassemble the Highlighter: Carefully take apart a highlighter pen and remove the ink reservoir (the felt core).
Extract the Ink: Place the felt core into a small bowl or cup.
Dilute (Optional): If the ink color is too dark, you can add a small amount of clean water to dilute it, making the marks less visible under normal light. Be careful not to over-dilute, or the fluorescent effect will weaken.
Write: Dip a cotton swab or paintbrush into the diluted highlighter ink and write your secret message on white paper.
Dry: Allow the ink to dry completely. Under normal light, the ink should be virtually invisible or very faint.
Transfer to a Pen (Optional): If you want to make a true “invisible pen,” you can carefully use a syringe or dropper to inject the extracted and diluted ink into an empty, clean ballpoint or gel pen refill.
Development Effect: When illuminated with a UV light, the hidden text will immediately glow brightly, matching the original highlighter’s color.
Pros and Use Cases:
Pros: Easy to make, very noticeable and bright fluorescent effect, high success rate.
Use Cases: Kids’ entertainment, party games, creating visible secret messages, and science experiment demonstrations.
4. DIY Recipe 2: Using Laundry Detergent (Economical and Effective)
Many laundry detergents contain optical brighteners, which absorb UV light and emit blue light, making clothes appear whiter and brighter. We can use this property to make invisible ink.
Step-by-Step Guide:
Extract Optical Brightener: Put a small spoonful of laundry detergent into a small bowl.
Add a Little Water: Gradually add a small amount of clean water (just a few drops) and stir well with a cotton swab or spoon to create a thick liquid (be careful not to add too much water, or the solution will be too dilute). The goal is for the liquid to be cloudy but without noticeable particles.
Settle (Optional): You can let it sit for a few minutes to allow some insoluble particles to settle at the bottom, then use only the clear liquid from the top as your ink.
Write: Dip a cotton swab or paintbrush into the top liquid and write your secret message on white paper.
Dry: Allow the ink to dry completely. Under normal light, the ink should be almost invisible.
Safety Precautions:
Avoid Ingestion: Laundry detergent is a chemical product; never ingest it. During preparation and use, always supervise children to prevent them from getting it in their eyes or mouth.
Wash Hands: Always wash your hands thoroughly with soap after the experiment.
Allergies: Some people may be allergic to laundry detergent. Please exercise caution when handling.
5. DIY Recipe 3: Using Vitamin B2 (Riboflavin) Solution (Safest, Great for Kids)
Vitamin B2, also known as Riboflavin, is a water-soluble vitamin that inherently possesses natural fluorescent properties. Its solution will glow yellow-green under UV light, and it’s harmless to the human body, making it an ideal choice for children’s science experiments.
Step-by-Step Guide:
Dissolve Vitamin B2 Tablets: Take 1-2 Vitamin B2 tablets (usually small yellow pills).
Create Fluorescent Liquid: Place the tablets in a small bowl and add a small amount of water (about 10-20 ml). Stir with a spoon or cotton swab to help the tablets dissolve. The water may turn yellow; this is normal and won’t affect its fluorescent effect.
Write: Dip a cotton swab or paintbrush into the dissolved Vitamin B2 solution and write on white paper.
Dry: Allow the ink to dry completely. Under normal light, the ink should be very faint or invisible.
Drinkable Safe Formula: Because this recipe uses a water-soluble vitamin, it is the safest among all the formulas. Even accidental contact or minor ingestion is harmless. This makes it the best-recommended version for children’s experiments.
6. Classic Method: Lemon Juice (Heat-Based, Not UV)
While this isn’t UV invisible ink, lemon juice is one of the most classic and widely known methods for invisible ink. We include it here for comparison to distinguish between development methods.
Principle: Lemon juice contains carbohydrates (like sugar) and weak acids. When you write with lemon juice and it dries, the marks are almost invisible on the paper. However, when the paper is heated (e.g., by ironing, using a hairdryer, or holding it near a light bulb), the substances in the lemon juice oxidize and caramelize, leaving a brownish trace that reveals the message. This process differs from the UV fluorescence principle.
Differences from UV Ink:
Development Method: Lemon juice requires heat to develop, while UV invisible ink requires UV light.
Reversibility: Once lemon juice is developed, the message is permanent and cannot become “invisible” again; UV invisible ink becomes invisible again once the UV light is removed.
Interaction: UV invisible ink offers a stronger “magic” and technological feel, especially suitable for creating instant surprise effects.
7. How to Reveal the Message
The right development tool is key to making your invisible ink work.
What Kind of UV Light Works Best?
As mentioned earlier, a UV flashlight or blacklight with a wavelength of around 365nm to 395nm works best. These are commonly found in currency detectors or dedicated UV flashlights.
Slowly move the UV light over the paper with the invisible ink, and you’ll see the words begin to glow.
White Paper vs. Colored Paper:
White Paper: Usually works best. White paper typically contains little (or no) optical brighteners that would interfere with the invisible ink’s fluorescence, making the ink’s glow stand out more clearly.
Colored Paper: Some colored papers may contain fluorescent dyes or their color itself might absorb UV light, which can affect the visibility of the invisible ink, making it less pronounced.
How to Prevent Premature Exposure?
Store in Darkness: Papers written with invisible ink should be stored in a cool, dark place, away from prolonged direct sunlight. Sunlight also contains UV components that could faintly activate the fluorescence or cause some ink components to degrade.
Avoid Heat and Humidity: High temperatures and humidity can also accelerate the decomposition of certain ink components, affecting invisibility or fluorescent intensity.
Use Clean Tools: Ensure writing tools and containers are clean to avoid mixing in other pigments or substances.
8. Is It Safe? Choose Ingredients Wisely
Safety is always the top priority when undertaking any DIY project, especially when children are involved.
Using Natural Ingredients (Vitamin B2) is Better for Children:
Vitamin B2 (Riboflavin) solution is undoubtedly the safest formula because it’s an essential vitamin for the human body. Even accidental skin contact or minor ingestion is harmless. This is a strong recommendation for children’s science experiments.
Avoid Formulas Containing Industrial Pigments or Chemical Toxins:
While the main components of laundry detergent (optical brighteners) are generally safe, the detergent itself contains surfactants and other chemicals. Avoid direct skin contact or ingestion. Always supervise children during use and wash hands thoroughly afterward.
Never attempt to use industrial dyes, fluorescent agents, or unknown chemicals to make invisible ink. They may contain toxic ingredients that pose serious health risks.
Adult Supervision is Essential:
Regardless of the chosen recipe, if children are participating in the experiment, a parent or guardian must supervise them throughout the entire process to ensure all operations are conducted safely and according to guidelines.
9. Fun Ideas to Use UV Ink
Now that you’ve mastered the creation process, it’s time to unleash your creativity!
Party Invitations or Birthday Cards: Create party invitations or birthday cards where special patterns or secret messages only appear under UV light.
Treasure Hunts: Hide objects around the house or outdoors, then write clues with invisible ink, leaving only a UV flashlight as the “decryption tool.”
DIY “Detective Games” or “Secret Missions”: Design a “spy kit” for children, write secret mission instructions with an invisible ink pen, letting them play the role of little detectives.
Engaging Science Experiments in Education: Teachers can use these experiments to teach students basic principles of light (UV), substances (optical brighteners, vitamins), and chemical reactions, making abstract scientific knowledge vivid and engaging.
Conclusion: Safe Creation, Endless Fun
With the detailed guidance in this article, you’ve now mastered several practical methods for safely making UV-invisible ink at home. Whether you use highlighter ink, optical brighteners from laundry detergent, or the safest option—Vitamin B2 solution—these simple materials can open up a world of mystery and creativity for you.
This is not just a fun DIY project; it’s also an excellent opportunity to explore scientific principles. Now, it’s time to gather your materials and embark on your secret writing adventure! We encourage you to try different recipes, compare their effects, and share your amazing discoveries with family and friends. Remember, safety first, and enjoy the fun!
Frequently Asked Questions (FAQs)
Can I use lemon juice for UV invisible ink?
No, lemon juice is NOT for UV-invisible ink. It’s a classic invisible ink that requires heat (like from an iron or lamp) to reveal the message, not UV light. The principle behind it (oxidation and caramelization) is different from fluorescence.