A UV DTF (Direct-to-Film) decal is a ready-to-apply, cold-transfer sticker printed using UV-curable inks (CMYK + White + Varnish) onto a specialized adhesive Film A and laminated with Film B. Unlike traditional heat transfers, UV DTF decals require zero heat pressing—offering a scratch-resistant, waterproof, and embossed 3D finish directly on hard, smooth surfaces like glass, metal, acrylic, and plastic.
Want to create custom transfers for tumblers, bottles, phone cases, or wood without a heat press? UV DTF technology makes fast, durable personalization seamless. In this complete guide, you will learn how to print UV DTF stickers from scratch and apply them smoothly without air bubbles or peeling edges.
What Is a UV DTF Decal?
A UV DTF decal is a printed sticker made using special UV ink and a two-layer film. You print your design on the first layer (called A film), cover it with a second layer (B film), and cure it using a UV light. Then, peel and stick — no heat press is needed.
Great for decorating:
- Tumblers and cups
- Glass jars and bottles
- Phone cases, laptops
- Candles, signs, and packaging

What You Need to Get Started
Here’s a simple list of what you need:
| Tool/Material | What It’s For |
|---|---|
| UV DTF Printer | Prints the design using UV ink |
| UV Ink (CMYK + White + Varnish) | For full-color, durable prints |
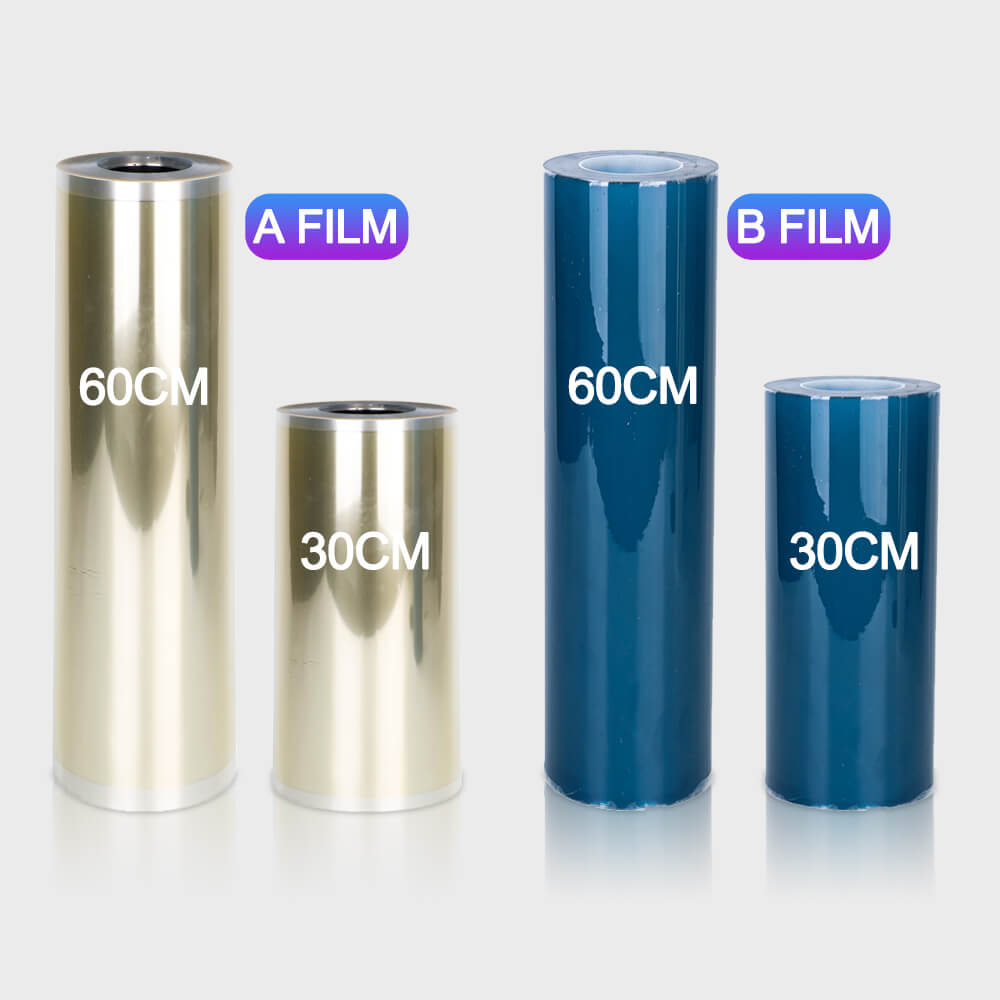
| UV DTF A Film | The film you print on |
| UV DTF B Film | Transfers the print onto surfaces |
| UV Lamp / Light | Dries (cures) the ink instantly |
| Roller or Laminator | Presses B film evenly over A film |
| Scissors / Cutter | Cuts out the finished decal |

💡 Winnerjet offers high-quality A & B UV DTF films that work smoothly with most printers and surfaces.
How to Print & Make UV DTF Stickers (For Creators & Businesses)
✅ Step 1: Create Your Design
- Use simple software like Photoshop, CorelDRAW, or Canva.
- No need to flip the design — you’ll apply it as printed.
- For dark surfaces, make sure to add a white ink layer behind the colors.
✅ Step 2: Print on A Film
- Load your A film into the UV printer.
- The printer will print 3 layers:
- Color (CMYK)
- White layer (for backing)
- Gloss layer (varnish for shine and protection)
✅ Step 3: Laminate With B Film
- Carefully place the B film (sticky side down) on top of the printed A film.
- Use a roller or laminator to press them together.
- Make sure there are no air bubbles — press evenly.
✅ Step 4: Cure With UV Light
- Use a UV lamp or the printer’s built-in UV light to dry the ink.
- Shine the light for 10–30 seconds, depending on the lamp’s strength.
- You’ll know it’s ready when the print feels dry and smooth.
✅ Step 5: Cut and Apply
- Cut around your design using scissors or a cutter.
- Gently peel off the B film — the full design will come with it.
- Stick it to a clean surface (like a glass cup) and press it down firmly.
- Slowly peel off the clear layer, and you’re done!
How to Apply UV DTF Transfers (Bubble-Free Application Guide)

Step 1: Clean and Prepare the Surface
Wipe down the hard substrate (glassware, stainless steel tumblers, acrylic, ceramic, or hard plastic) using an isopropyl alcohol wipe.
Ensure the surface is completely dry and free from dust, oil, or fingerprints.
Step 2: Peel Off the Film A Backing
Place the transfer face up and burnish firmly across Film B with a hard squeegee or your thumb to ensure the adhesive grips the carrier sheet.
Slowly peel off Film A (the release liner) from the back, confirming that the entire printed decal remains bonded to Film B.
Step 3: Position and Apply (Edge-to-Edge)
Align the decal carefully over the object—UV DTF adhesive bonds instantly on contact and cannot be repositioned.
Lay down one edge first, then work across to the other side using a squeegee to push out any trapped air. For curved tumblers, secure the center line first and press outward to both sides.
Step 4: Slowly Peel Off Film B
Rub the transfer firmly against the substrate one more time.
Peel Film B back at a sharp 180° angle flat against the surface rather than pulling straight up, preventing edge lift.
Step 5: Final Check and Bond Setting
Inspect all fine details and edges to ensure full adhesion.
Allow the transferred decal to rest at room temperature for 24 hours before washing or heavy handling to achieve maximum chemical and mechanical bond strength.
Tips for Better Results
- 🧽 Clean your surface before applying the decal (no dust or oil).
- 💡 Test UV curing time — if the design peels off, it may not be fully cured.
- 🖼️ Apply decals slowly on curved items to avoid wrinkles.
- ✂️ Cut close to the design for a clean look.
Why Winnerjet UV DTF Film Makes It Easier
Choosing the right materials can save you a lot of time.
- 🧼 Easy to peel and apply
- 💎 Crisp and colorful with strong ink hold
- 🧲 Stick well to most hard surfaces
- 💡 Designed for smooth curing with no bubbles
👉 Whether you’re a small business or a creative crafter, Winnerjet films help you get perfect results with less effort.
Quick UV DTF Setup Checklist
✔ UV printer with CMYK + White + Gloss ink
✔ UV DTF A film (print layer)
✔ UV DTF B film (transfer layer)
✔ UV light source or lamp
✔ Laminator or hand roller
✔ Clean the surface and scissors/cutter
Final Thoughts
UV DTF decals are a fun and professional way to decorate just about anything. And the best part? You don’t need a heat press — just print, cure, peel, and stick.
To get the best results:
- Use UV-cured ink and A/B film
- Cure your design properly under UV light
- Apply to clean, smooth surfaces
👉 Want smoother, brighter, easier results? Try Winnerjet’s UV DTF A/B films — trusted by pros and creators worldwide.
FAQs – Making UV DTF Decals
Can I use a regular DTF printer for UV DTF?
No. UV DTF uses UV-curable inks, not regular water-based or pigment inks.
Do I need to flip the design before printing?
No. Unlike fabric DTF, UV DTF is applied directly — no mirroring is needed.
What surfaces can I apply these decals to?
They work best on smooth, hard surfaces like glass, plastic, metal, wood, and acrylic.
Why is my decal not sticking well?
Check if it’s fully cured and that the surface is clean. Also, make sure you’re using good-quality film.
Are UV DTF decals waterproof?
Yes! Once cured and applied, they are waterproof, scratch-resistant, and long-lasting.