Removing UV DTF prints from glass can be tricky — the adhesive is strong and designed to last. But with the right tools, patience, and a careful approach, you can take it off without scratching or leaving residue. Here’s a step-by-step guide that works for small craft items and large glass panels alike.
1️⃣ Gather the Right Tools
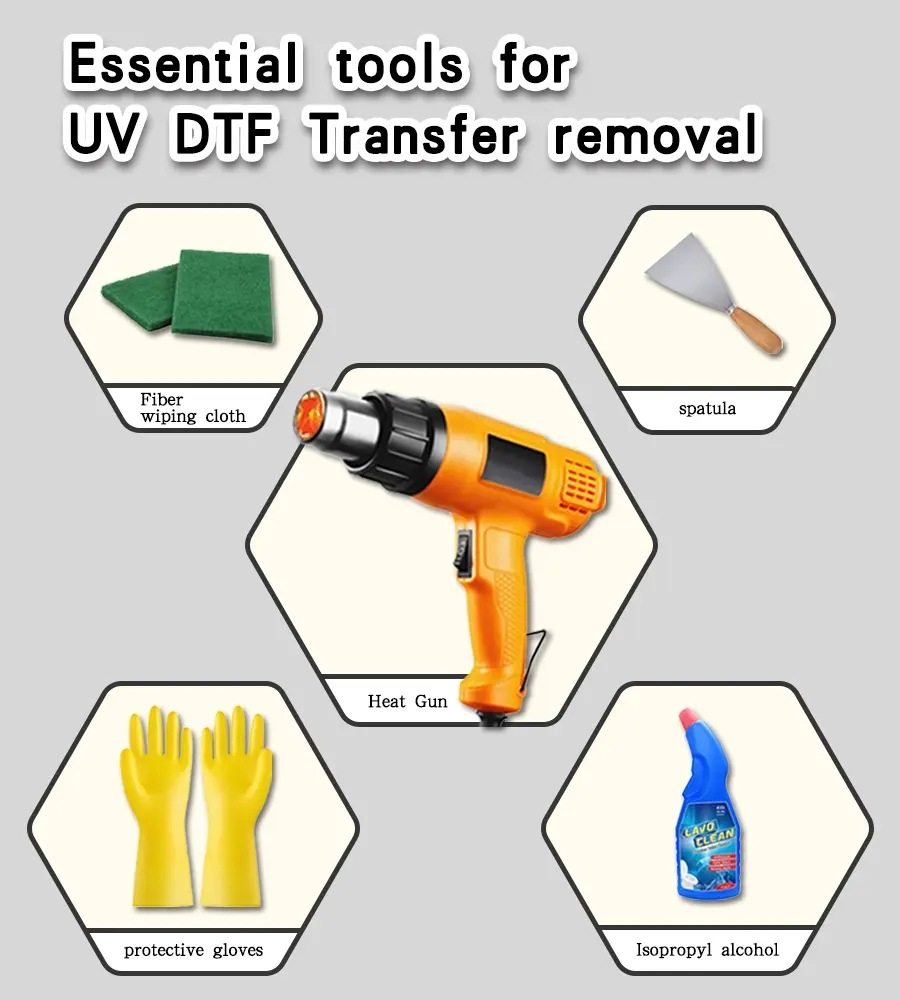
Before you start, make sure you have the right supplies to avoid damaging the glass. You’ll need:
- Plastic scraper or old credit card (avoid metal to prevent scratches)
- Isopropyl alcohol (70%–90%) or adhesive remover
- Heat gun or hairdryer
- Microfiber cloths
- Protective gloves
💡 Pro Tip: Using a high-quality adhesive remover will save time. Winnerjet’s UV DTF adhesive release solution works well for thick, stubborn prints.
2️⃣ Soften the Adhesive with Heat
- Turn on your heat gun (low to medium setting) or hairdryer.
- Hold it 2–3 inches away from the UV DTF print.
- Heat for 20–30 seconds, moving in slow circles to avoid overheating the glass.
Why it works: Heat softens the UV DTF adhesive, making it easier to peel off without tearing.
3️⃣ Start Peeling from the Edge
- Use your plastic scraper to lift one corner gently.
- Once you get a grip, peel slowly and steadily.
- If you feel resistance, stop and apply more heat before continuing.
Avoid: Pulling too fast — it can cause the film to break into small pieces, making removal harder.
4️⃣ Remove Leftover Adhesive
After peeling, some sticky residue might remain. Here’s how to clean it:
- Soak a microfiber cloth in isopropyl alcohol or adhesive remover.
- Apply it to the residue and let it sit for 2–3 minutes.
- Wipe in circular motions until the glass is clean.
Winnerjet’s adhesive release solution can remove residue in under a minute, even from large surfaces.
5️⃣ Final Clean and Inspection
- Wipe the glass with a clean microfiber cloth and glass cleaner.
- Inspect for any scratches or haze — if present, buff lightly with a non-abrasive polishing cloth.
- Let the glass cool down before reapplying any new UV DTF print.
✅ Quick Removal Checklist:
- Use heat to loosen the adhesive
- Peel slowly with a plastic scraper
- Clean residue with alcohol or remover
- Avoid metal tools to protect glass
✅ Need Better Materials That Don’t Peel?
If you want UV DTF prints that last but can still be removed cleanly when needed, Winnerjet’s UV DTF film and adhesive solutions are designed for strong adhesion with easy removal when necessary.
📩 Get a Quote Today to see the Winnerjet difference.
❓ FAQs: How to Remove UV DTF from Glass
Can I remove UV DTF from glass without heat?
Yes, but it’s harder. Without heat, you’ll need more adhesive remover and patience.
Will removing UV DTF damage the glass?
Not if you use plastic tools and avoid scraping too hard.
What if the UV DTF breaks into pieces?
Reapply heat to each section before peeling again.
Can I reuse a UV DTF print once removed?
No. UV DTF is not reusable — once removed, the adhesive loses its grip.
What’s the easiest way for large glass panels?
Work in sections, applying heat and peeling gradually, then clean all residue at the end.