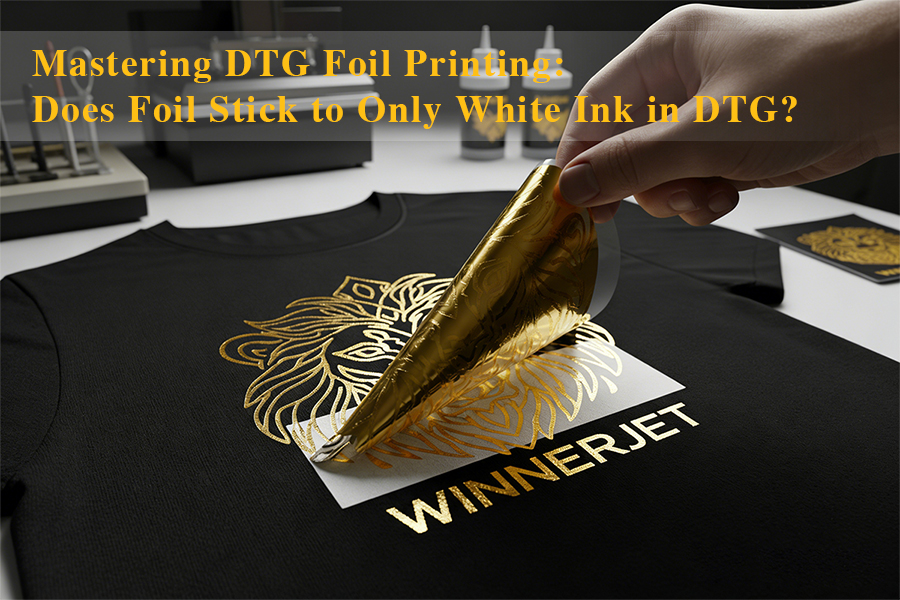
Yes, DTG foil primarily adheres to the wet/under-cured white ink. However, the real secret lies in the adhesive properties of the white ink versus CMYK inks.
Today, we will dive deep into the underlying logic of this process and share how to create stunning, wash-durable foil masterpieces.
Lorem ipsum dolor sit amet, consectetur adipiscing elit. Ut elit tellus, luctus nec ullamcorper mattis, pulvinar dapibus leo.
Why Does Foil Only Stick to White Ink in DTG?
Many DTG printers struggle with foil adhesion, often finding that the foil sticks perfectly to white areas but fails on CMYK colors. Understanding the science behind DTG white ink is the key to mastering this technique.

- The “Heat-Activated Glue” Property of Resin
White ink contains a high concentration of synthetic resins and titanium dioxide. This resin is thermoplastic: it remains semi-solid at room temperature but softens and becomes extremely tacky when heated in a heat press. At this moment, the metallic layer of the foil “locks” onto the activated resin at a molecular level.
- Thickness Determines Grip
“Thinness” is an advantage for CMYK but a fatal flaw for foiling. Because CMYK layers lack thickness, they cannot provide enough surface area for the foil to grab. White ink, however, creates a microscopic “plateau” on the fabric surface. This thickness provides the Mechanical Grip necessary to ensure the foil stays firmly anchored after cooling.
💡 Pro Tip: Your Visual “Secret Weapon”
By leveraging the “White Ink Only” rule, you can create sophisticated designs:
Selective Foiling: In your design file, only enable the white ink channel where you want the shine (e.g., logos or borders).
Textured Layering: In areas without white ink, the foil won’t stick, revealing the original CMYK print underneath. This contrast between “Matte Color” and “High-Gloss Foil” is the key to a high-end brand aesthetic.
Optimal Heat Press Settings for DTG Foil Transfer
To ensure your foil sticks only where you want it and stays there after washing, you must balance Temperature, Pressure, and Time.
| Parameter | Recommended Setting | Why It Matters |
|---|---|---|
| Temperature | 160°C (320°F) | High enough to melt the foil's adhesive layer without scorching the garment. |
| Time | 30 Seconds | Ensures the resin in the white ink fully bonds with the foil carrier. |
| Pressure | Heavy (6-8 bar) | Forces the foil into the texture of the white ink for a durable finish. |
| Peel Method | Complete Cold Peel | CRITICAL: Removing the foil while hot will cause jagged edges and poor detail. |
DTG Gold Foil: A 6-Step Operational Guide
Want to achieve that perfect metallic finish? Follow this DTG foiling workflow, optimized by the Winnerjet technical team:
Step 1: Artwork Preparation
Design in White: Ensure the areas to be foiled are set to pure white in your software. Remember: Foil only sticks to white ink; CMYK or black-only areas will not grab the foil.
RIP Processing: Import your file into professional RIP software (like neoStampa). Precisely set the white underbase density and “Choke” (choking the white pixels) to ensure clean, crisp edges.
Step 2: Direct-to-Garment Printing
High-Density White Print: Print the white ink onto a pre-treated garment. For maximum adhesion, we recommend a white ink density of 150%-200%.
Existing Equipment Compatibility: No extra equipment is needed. Use your current DTG printer with Winnerjet High-Resin White Ink to start high-end foil production.
Step 3: Position the Foil
Precise Alignment: Cut the foil sheet slightly larger than the design. Use a T-square or alignment tool to lay the foil flat over the freshly printed, tacky white ink area.
Step 4: Heat Press (The Magic Numbers)
Settings: Place a protective sheet (parchment or silicone paper) over the foil. Set your heat press to 165°C (330°F) with Heavy Pressure for 45-60 seconds.
Why Heavy Pressure? Intense physical pressure forces the metallic layer into the white ink polymers, creating a permanent molecular bond.
Step 5: Cold Peel and Second Press
Must Cold Peel: This is the most critical detail. Do NOT peel immediately. Wait until the garment has completely cooled to room temperature. This allows the resin to re-solidify and lock in the metal.
Second Press: After peeling, cover the design with a Teflon sheet and press again for 10 seconds. This flattens the edges and significantly improves wash fastness.
Step 6: Post-Cleanup
Edge Cleaning: Small metallic flakes may remain around the edges. Use a wadded-up old t-shirt or a soft cloth to gently wipe the edges and remove any debris.
The Perfect Finish: Your masterpiece—featuring fine details and high-gloss metallic shine—is now ready for your customer.
💡 Winnerjet Expert Tips:
Washability: Foil prints following this process can reach an AATCC wash fastness rating of 3.5-4.
Consumables: Using Winnerjet Specialized High-Resin White Ink provides superior “chemical grip,” drastically reducing the risk of flaking after washing.
4 Key Steps for Successful Foiling
Achieving a “Retail-Grade” foil effect is about precision, not just laying a sheet down. Follow these four golden rules:
- Build a Solid White Base (The 200% Rule)
White ink thickness determines the lifespan of the foil. In your RIP, set the White Underbase to 150%-200%. If the ink is too thin, the foil has no “roots”—it’s like building a house on sand.
- Lay the Groundwork (Pre-treatment)
Pre-treatment prevents ink bleeding and flattens the fabric. Increase your pre-treatment amount by 10-15% and pre-press for 5 seconds to flatten micro-fibers, creating a mirror-smooth surface for the ink to sit on.
- Master the “Magic Numbers”
Consistency is key. Use 330°F (165°C) for temperature, Heavy Pressure to “squeeze” the foil into the ink, and 45-60 seconds to allow heat to penetrate fully.
Our Lead Technician says: ‘The biggest mistake is ignoring the room temperature. Foil cools slower in humid environments, wait an extra 2 minutes before peeling.[Display]
- The Cold Peel Patience
Heat makes resin soft. Peeling while hot causes the metal to fracture. Waiting for a full cool-down ensures the resin has “clamped” onto the foil.
Why Is Your Foil Peeling?
If you experience fading or peeling after a wash, check these three factors:
Insufficient Pressure: Foiling requires much higher physical pressure than standard curing.
Skipping the Second Press: A 10-second post-peel press is vital for “fusing” the edges into the fabric.
Foil Compatibility: Ensure you are using Digital Textile Foil, not standard craft foil.
Quick Tip: Using a Teflon sheet for the second press adds an extra layer of durability and a professional, smooth finish.
How to Quantify Foil Durability
In custom printing, quality should be documented, not guessed. According to AATCC (American Association of Textile Chemists and Colorists) 61-2A wash tests, the lifespan of DTG foil depends on the molecular bond between the resin and the metal layer.
Data shows that standard, unoptimized foiling often only reaches a 2.5 rating (Fair), leading to peeling after a few washes. However, by combining “200% White Ink Density” with the “Second Press” process, wash fastness can jump to a 3.5 – 4.0 rating. This means your prints can withstand 20-30+ wash cycles while maintaining over 80% of their metallic luster.
Winnerjet lab data confirms that using Winnerjet High-Resin White Ink with our optimized process elevates durability from the industry average to premium retail standards.
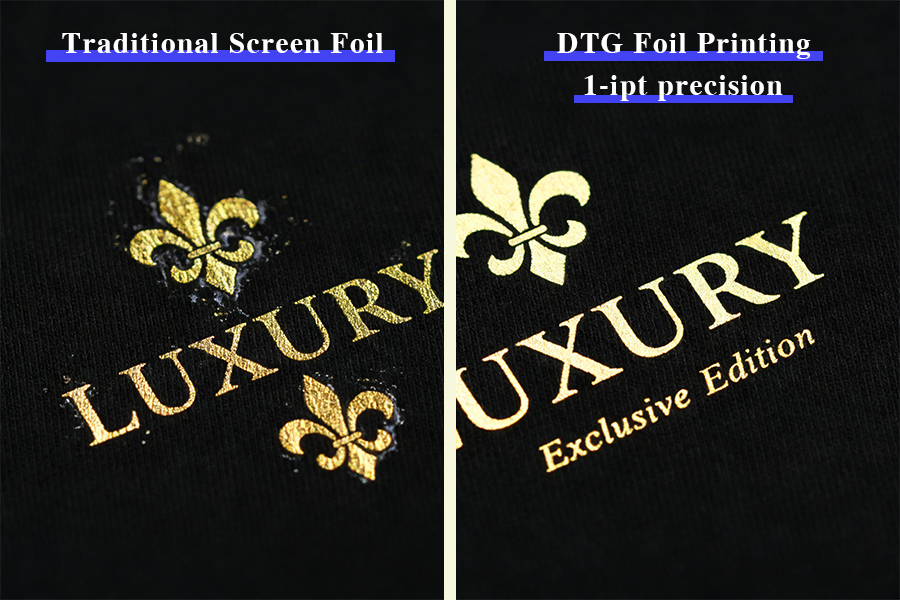
The Advantages of DTG Foiling
Foil isn’t new, but its evolution defines its commercial value. Here is the core difference between traditional methods and the DTG Foil solution:
| Feature | Traditional Screen Foil | DTG Foil Printing |
|---|---|---|
| Adhesive Medium | Specialized Foil Glue | Activated DTG White Ink Resin |
| Detail Level | Low (Limited by mesh count) | Extreme (1-pixel fine lines) |
| Hand Feel | Thick, "Plastic" feel | Softer, better fabric integration |
| Minimum Order | High (Requires setup) | 1 unit (Perfect for POD) |
| Registration | Manual (Prone to error) | Digital (100% perfect) |
Expert Advice: How to Maximize Your DTG Foil Potential
As a professional supplier, Winnerjet offers these advanced tips:
Match Your Ink: Winnerjet High-Resin White Ink is chemically optimized for foiling. Its higher solid content acts like “Super Glue” the moment it hits the heat press.
Fabric Tuning: For 100% Combed Cotton, use 180% ink. For Canvas or Blends, use a “Double Pre-press” and 200% ink to overcome coarse fibers.
Preventative Maintenance: High-resin inks can dry faster on the wiper. Use Winnerjet Maintenance Liquid daily to prevent clumping and extend printhead life.
Profit Analysis: While foil adds $0.50 – $1.20 in cost, the visual premium allows for a 50%+ increase in retail price.
Conclusion
While DTG foiling requires strict attention to detail, the results are undeniable. By pairing Winnerjet High-Resin Specialized White Ink with a disciplined “Second Press” workflow, you achieve industrial-grade durability without losing the flexibility of digital printing. In a crowded market, this small technical upgrade is the key to higher margins and winning high-end clientele.
Ready to test the shine for yourself?[Contact the Winnerjet Technical Team to get your Specialized White Ink Sample Pack]